Menu
Your Cart
Use Code Today on all products Shop now

RETROL Engine

Introduction

A Chinese website called V8engineforsale serves as an online store for several Chinese model engine brands, including Musa and Retrol. I have bought many of their products over the years. Some are great, but others need fixing because they weren't tested enough before being made in large quantities.

In May 2024, I received an email from V8engineforsale asking for an unbiased review of one of their newest products: the Beam Engine and Boiler model steam plant kit.

Although Retrol/EngineDIY may take note of my observations and fix the issues, it's safest to assume that they've already produced a sizable batch and that an improved version will be sometime in the future.

General Assembly

Examining the construction papers reveals a schematic that highlights certain safety features. However, further instructions are needed regarding carbon monoxide risk, managing fuel safely, hazardous fires, and not leaving small children unattended.

The instructions for assembling something are shown through drawings instead of actual images. The drawings are good, but they often don't include extra information. A numbered parts diagram is included but lacks part names, which is crucial for learning purposes.

Instead of using vague labels, provide clear descriptions in a table. For example, instead of "part 3," use "Connecting Shaft." Instead of "part 7," use "Cylinder and Chest Subassembly." This will make it easier for others to understand and identify the different parts.

Step-by-Step Assembly Observations

These are my observations after going through each step of the construction sheet one by one;

1. I need to figure out how the Chest (part 7) and Cylinder are fastened together.

There are no solder marks or screws. How long would they last if they were merely glued together? It should be noted that at this time, the retaining screws should be left slightly loose.

I like that the mounting plate has holes for accessing the screws. These screws are needed for adjusting the components in Step 1 later on. Please note that you should slightly loosen the nuts and screws holding the Main Bearing Pedestals (parts 11) at this time.

3. Unfortunately, part 1, the beam, Watts parallel motion, piston, shaft, etc., are supplied as a fully assembled subassembly. Assembling each component would have provided great satisfaction.

The lack of a piston ring is disappointing because strong nylon significantly reduces steam leaks without dragging.

4. The roller bearings (part number 18) should press fit into the central bearing pedestals; however, they must be more balanced.

Unfortunately, part 12's eccentric rod, crank, valve, etc., are supplied as a subassembly instead of individual pieces. This can be seen as a drawback.

It would be more convenient if each piece was supplied separately. This would make assembly easier. It would also allow for easier replacement of individual parts if needed. An essential learning point is that the Eccentric/Valve regulates the steam flow into the Cylinder, crucial to a steam engine's functioning.

6. It is advantageous if the grub screw is already inserted into the Flywheel hub (part 4), as this makes assembly on the Shaft easier.

The flywheel is made of aluminum. Using a heavier steel flywheel would make the engine run slower, which looks better for a beam engine. The Flywheel has a visible wobble, which many people won't tolerate.

7. To ensure extremely smooth spinning, the screws for the Bearing Pedestals (part 11) must be gradually tightened while the Flywheel is rotating. To keep them in place, the Pulley Wheel (part 16), Spacer (part 15), and Eccentric Wheel (part 12) should also be pushed up to the Main Bearings. The Spacer looks to wobble on the Crank Shaft because its internal bore is bored out somewhat too large (part 14).

8. It is okay to tighten the Crankpin (part 10) counterclockwise according to the diagram because it has a left-hand thread; it would have been simple to construct the engine to run oppositely, in which case a regular thread could have been used. To ensure that there is no binding, gradually tighten the remaining screws while turning the flywheel. Since all moving elements usually fit loosely, getting remarkably free movement should be simple with caution. Steam pressure will be lost due to any tightness.

9. As mentioned in the previous comment, it would have been better to assemble the Fly-ball governor/regulator (part 17) from individual components instead of mounting it as a bolt on a subassembly.

The bearings supporting the regulator shaft appear glued together, making it difficult to tighten them by pressing them together. Despite this, the bearings are incredibly loose. The design should be changed to ensure the brass tubes align precisely (about 1mm off).

Although I wouldn't say I like the silicon tubes (parts 35), they keep the price low. To ensure that the regulator valve can move freely up and down, gradually tighten the longer screw (part 23).

10. I used air pressure to test the boiler before assembly. The boiler kept most of the pressure for a few minutes without any big leaks. The safety valve released at 20 psi, which is safe for this setup.

11. The pieces 29 through 33 of the boiler support/mount assembly went well.

12. The Boiler fitted into its mount with ease.

13. Once more, leave the screws loose until they are all in position, then tighten, just like you did with the Boiler Bands (part 32).

14. The brass pipe connecting to the regulator's boiler needs to be longer. To keep the silicon connecting tube straight and only bridge a small distance, the brass pipes from the regulator to the boiler should be long enough, oriented, and bent to be near enough. This would be relatively cheap, more pleasant, and more secure.

15. The Burner (pieces 36, 37, and 38) is simple to put together.

16. According to the instructions, the Burner runs on 95% alcohol. Methylated spirits, sometimes known as meths, were the fuel used by Mamod steam engines and other engines during the 1960s and 1970s. This was replaced, for safety concerns, by solid fuel tablets and, more recently, fuel gel after fuel tablets were controlled in the UK.

To use fuel gel with the Burner, you need to make some adjustments. You can find fuel gel at Forest Classics website. Visit https://www.forest-classics.co.uk/wilesco/wilesco-spares/gel-fuel-250-ml. Priority one should be given to replacing the supplied alcohol/meth burner with an open pan fuel gel burner, which is less expensive to produce and safer to use.

Beginners need additional safety rules. These rules help them understand how to handle fuel properly. They also teach them how to prevent burns. In addition, beginners learn to watch small children and avoid carbon monoxide poisoning.

Though it's a good idea, the tank/tray (part 27) to collect the engine's condensed steam is too high to slide beneath the base simply. This might be fixed with a straightforward design modification.

Operating the Engine

I made the following observations while operating the engine and boiler; click here for a video of this.

1. It's best to run the engine outside in an area with excellent ventilation. To reiterate what I said before about the burner, meth is not a pleasant smell, and it is straightforward to spill meth when filling the burner.

2. Hot water can be added to the boiler to shorten the time it takes to reach steam. The pressure relief valve must be unscrewed to fill the boiler; a syringe or something similar is required because the fill hole is too tiny for a funnel. The steam exit valve on top of the boiler must also be opened.

3. Fill the boiler to around three quarters, leaving room for the production of steam, using the sight glass on the end of the boiler.

It can be challenging to see in bright light, but it looked straightforward to light both wire wicks. 4. Wear flame-resistant gloves to light the burner because spilled meth may also catch fire (part 38). Slide the ignited burner beneath the boiler.

Verify that the steam exit valve is closed in step 5. In five to ten minutes, the pressure valve should begin to release, signaling that steam is being produced, depending on the original water temperature and the outside air temperature.

6. Open the steam exit valve. Turn the flywheel to clear any condensed steam or water if the engine still won't start.

7. The engine started and ran well right away. A little water or steam comes out of the valve, but it's not a big issue. The piston doesn't leak much even though it's missing a ring. As mentioned before, using a binding will decrease steam pressure. However, a well-built engine should not need much pressure to run without a load.

8. To test whether the fly-ball governor cuts off steam to the engine when the fly-balls are moved outward, manually operate the governor after removing its pulley belt. A few tweaks might be necessary to get the governor to run the engine slowly, but I was pressed for time to give it a closer look. Despite the steam outlet valve's excellent control over speed, the governor is aesthetically pleasing overall.

The burner doesn't produce enough power to keep the engine running at high speed for more than a few minutes. So, the steam outlet valve needs to be closed to build up steam pressure again. The burner's meth supply will run out in around ten minutes.

10. The whistle works well. However, it is not recommended to use it. This is because the metal lever gets hot quickly. Additionally, it lets out steam from the boiler. Retrol should provide a scaled-down model including a plastic lever or exclude inclusion altogether to reduce expenses. 


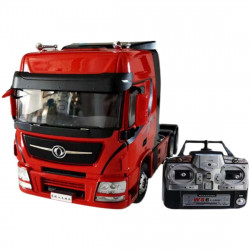
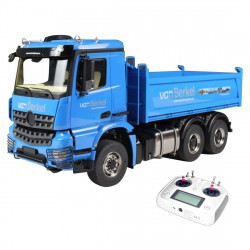
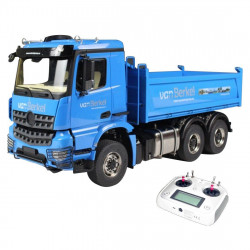
1/24 2.4g  simulation rc engineering  tow truck detachable flatbed semi trailer tractor model rtr 1/24 2.4g  simulation rc engineering  tow truck detachable flatbed semi trailer tractor model rtr
-0 % Out Of Stock
Model: 10083
1/24 2.4G  Simulation RC Engineering  Tow Truck Detachable Flatbed Semi Trailer Tractor Model RTRFeatures:The 1/24 portion of the design is ready to operate and based on the truck's structure and philosophy. It may function similarly to an actual transport vehicle. Together, the front and ..
$539.99 $539.99
Ex Tax:$539.99
Model: 10089
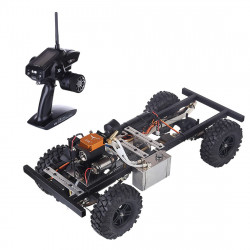
1:10 DIY Modified Nitro RC Car without Car Body Shell (with TOYAN FS-S100A / 4CH 2.4g remote control / One Key Remote Start Engine / Automatic Clutch) - RTR VersionFeatures:.This RC gasoline automobile was improved and modified by the user. equipped with a 4CH 2.4g remote control and an engine (TOYA..
$849.99 $849.99
Ex Tax:$849.99
Model: enjomor-alpha-type-stirling-engine-twin-cylinder-twin-piston-ec-
  ENJOMOR Alpha Type Stirling Engine Twin-Cylinder Twin-Piston EC Engine ModelFeatures:.Advanced Alpha-Type Configuration: Our Stirling engine's cutting-edge Alpha-Type twin-cylinder twin-piston design maximizes power generation and performance while providing exceptional heat transfer efficie..
$176.99 $176.99
Ex Tax:$176.99
Model: 10087
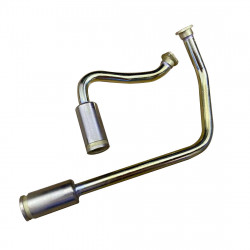
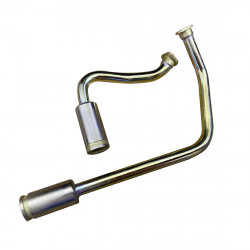
Exhaust Pipe Set for R29 Engine or DIY ModificationFeatures:The stylish brass exhaust pipe set is appropriate for DIY modifications or R29 engine models.Specifications:.Material: Brass.Product Weight: 150g.Package Dimensions: 15 x 6 x 8cm.Package Weight: 160g.Paking: Box..
$29.99 $29.99
Ex Tax:$29.99
Model: 10059
Gasoline V-Twin Small OHV 4.3CC Double-cylinder Four-stroke Engine R28Features:.The miniature petrol engine model, based on the V-twin double-cylinder motorcycle engine from the 1970s, beautifully captures the essence of many eras..The retro vehicle restores various authentic engine elements, includ..
$699.99 $699.99
Ex Tax:$699.99
Model: 10299
Features:.Introduction: The HOWIN team recently unveiled the L4-172, a miniature inline four-cylinder four-stroke engine model that exhibits a powerful engine production attitude. It is based on early, extensively used real automobile engines that are perfectly styled and aesthetically pleasing, and..
$999.99 $999.99
Ex Tax:$999.99
Model: inch-thread-3-16-40-spark-plug-with-insulation-cap-for-retrol-4-
Inch Thread 3/16-40 Spark Plug with Insulation Cap for Engine ModelFeatures:For the R29 engine model and the HOWIN L6-210 engine model, the spark plug with an inch thread 3/16-40 interface is intended to be used in conjunction with the matching CDI ignition kit for starting and ignition. .High Qual..
$19.99 $19.99
Ex Tax:$19.99
Model: large-torque-electric-drill-starter-usb-charging-portable-tool-f
Portable Large-Torque Electric Drill Starter USB Charging Essential Tool for Engine Models (Silver)Features:A high-performance brushed motor is used by the recently modified engine electric drill starter with one-button start to easily start a variety of engine models..Intelligent Protection: In ord..
$49.99 $49.99
Ex Tax:$49.99
Model: 10041
LXY RC 1/14 RC Hydraulic 6x6 Dump Truck Engineering Model 3-speed GearboxFeatures:.This is a fully operational, realistic 1/14 remote control hydraulic 6x6 dump truck model for the 1/14 vehicle and its attachments. The model functions like a real dump truck with a large carrying capacity because it ..
$3,544.99 $3,544.99
Ex Tax:$3,544.99
Model: 10268
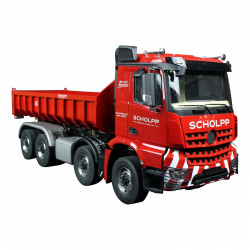
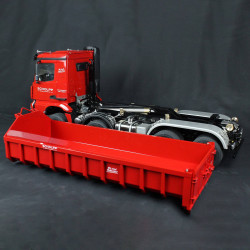
LXY RC 1/14 RC Hydraulic 8*8 Dump Truck Engineering Machinery Vehicle Model Three-Speed Gearbox Features:The genuine 1/14 scale remote control hydraulic 8*8 roll onroll-off dump truck model is ready to run and drive forward, backward, left, and right. It is compatible with Tamiya 1/14 scale vehicl..
$4,643.99 $4,643.99
Ex Tax:$4,643.99
Model: 10179
LXY RC 1/14 RC Truck Hydraulic 8×8 Dump Transport Truck with 3-speed Gear Box Features:.This is a ready-to-run 1/14 scale model of an RC hydraulic 8x8 dump truck that is compatible with 1/14 scale vehicles and accessories. .It resembles a genuine dump truck since the vehicle can travel forward..
$4,469.99 $4,469.99
Ex Tax:$4,469.99
Model: 10101
RCGF 60cc 6.0HP/8000rpm CNC Fixed Wing Gasoline Engine Air Cooled Single Cylinder 2-stroke RC Engine AirplaneFeatures:Engine for a fixed-wing model aeroplane, made of a tougher material with greater precision and shine.You will have an unmatched flying experience thanks to the increased power, power..
$429.99 $429.99
Ex Tax:$429.99
Showing 1 to 12 of 25 (3 Pages)